Homemade Mince Pies

Merry Christmas everyone.

I love Christmas, not because of the presents or the fact my birthday is close, but because it brings the family together. The hall is decorated with holly, a massive 9ft tree covered in vintage glass baubles stands in the corner and the house is filled with the smells of delicious food. Of course in the weeks before christmas, the hall is used to host friends for a glass of mulled wine and one of Grans famous mince pies. One year it even hosted a choir, but thats a different tale………

IMG_0311.JPG

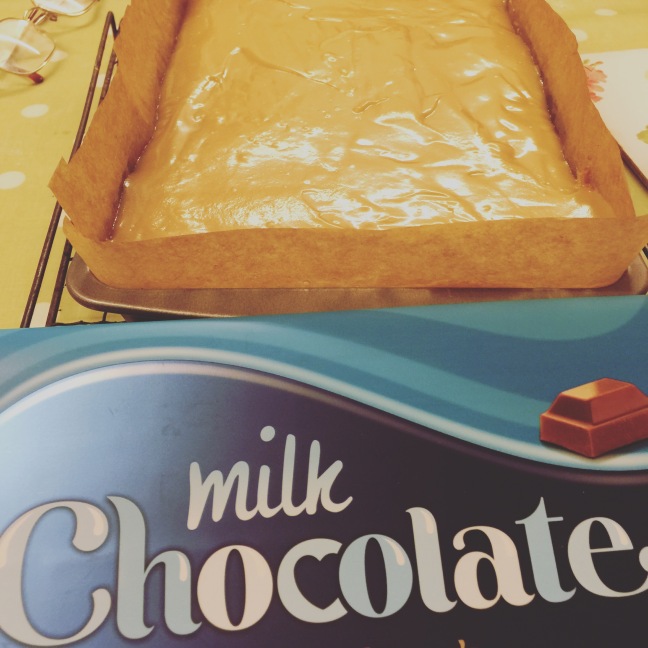
The key to a good mince-pie is thin crisp pastry, lots of filling and a generous amount of brandy butter. I don’t think its worth making your own mincemeat. Robertsons makes probably the best, but adding more fruit, spices and lots of alcohol take it to the next level.


Grandma Reynold’s Mince Pies

Ingredients

  • 9oz Plain Flour
  • 6oz Butter
  • 2oz Caster Sugar
  • 2 Egg Yolks
  • Whole Milk
  • 1 Large Jar Robertsons Mincemeat
  • 6oz Sultanas
  • Christmas Spirits
  • Cinnamon, Nutmeg and ground ginger

Start by making the pastry. You can use a mixer with a K beater or just use your hands.

Start by weighting out the flour, butter and sugar and rubbing together. If you have cold hands then fantastic, aim to keep the butter as cold as possible. Overworking the butter will cause it to melt and leave you with chewy, not flaky pastry.

When the mix resembles breadcrumbs, add the egg yolks and milk a tablespoon at a time  until the pastry comes together.

Then wrap in cling film and chill for an hour.

IMG_1204

Whilst the pastry chills, make the mincemeat filling. Combine the jar, fruit, spices and alcohol . Don’t add too much, the fruit will soak up some alcohol but not a whole bottle. Again, leave to steep for an hour whilst the pastry chills. It’s about the perfect length of time to put the lights up on the tree.

Once the pastry as rested, roll out to the thickness of a £1 coin on a well floured board. Remember to roll away from yourself and turn the pastry a 1/4 turn each time.

Using 2 cutters, stamp out the base and lid to each mince-pie. The pastry will make around 30 in total. I sometimes make a double batch and give them away as gifts. However as the tea room is open, they will be sold this time. Cheers Mum.

Grease a mince pie tin liberally with butter or Stork. The one I’m using is a vintage tray I bought Gran for Christmas when I was 8 from a long closed Antique shop. Its got a patterned base which makes a pretty mice pie.

Press the base pastry disc into the tin and add a healthy dessertspoonful of mincemeat into the case. Then add the lid, I tend to paint the edge of the pastry with a little water to help it stick. Press the lid into the base to produce a good seal and then glaze with egg wash.

Cook in a hot Aga (or conventional oven at 200) for 15mins, turning half way through the bake time.

When the mince-pies are golden brown, take out the oven and rest on a cooling rack till completely cooled. Don’t be tempted to remove before they have cooled though, they will just break apart.


Lets Eat

Grab a glass of mulled wine or a spiced Latte, open the brandy butter and slightly warm a mince-pie in the Aga. Then all that’s left to do is get the family together and enjoy the festive spirit. It seems like a good occasion to use some Emma Bridgewater pottery as well – Thats if the Polar Bear will give up any mince pies at all though……….

IMG_3367

Cuban Burgers, D-types and the Mille

“She held my hand and told me to be kind and gentle”

These sadly weren’t the words of a lover to me, but a close friends advice in my final year at Medschool. You see, during that year I had become a bit of a dictator; I had rewrote the curriculum, won a major Wellcome trust grant, deposed the head of the Academic Society. This was alongside becoming a favourite of the Urology team, getting a job offer and a myth about a Jag.

I love myths, this one related to a crashed D-type somewhere in Cuba. Well, I say myth, it’s currently on its way to my workshop. During my trip to rescue her, I stumbled upon a little bar by the beach. Here I had my first Cuban burger. These are a heady mix of lean beef, spicy chorizo, chillis and served in a soft Cuban roll with a side of skinny fries and topped with pulled pork if you’re feeling hungry

Now, I’m just finishing another long run of night shifts on the assessment unit, so fancy a treat. Time to make a few Cubanos and get some food.

Fennel Pulled Pork

As you can tell from the previous blogs, I like pulled pork. Whilst on the trail of my mythical Jag I kind of fell in love with an aromatically flavored Fennel Pork. It again is cooked overnight in a low oven, so those with Agas are at a distinct advantage.

IMG_0081

Ingredients

  • Pork Shoulder
  • Fennel seeds
  • Mustard seeds
  • Coriander Seads
  • Onions, Celery and Carrots
  • Course sea salt and pepper
  • Caster Sugar
  • Thornbrudge Jaipur IPA (or a good pale ale)


Start by making your dry rub. Combine the fennel, mustard, coriander, salt, sugar and celery salt in a pestle and motor and grind to a coarse powder. This relieves some of the pent up stress of finding parts of a Jag race engine.

IMG_0085.jpg
Next it’s time for a bit of chopping. Layer the bottom of a large Le Cresuet with onion, carrot, celery and a bit of bay leaf if you have any. On top of this place the shoulder of pork.

Massage the dry rub into the Pork and then add a hearty glug of Worcester sauce and a pint of a good quality beer.
As you can tell I’ve been drinking a lot of Juipur recently and it made sense finish the Keg off.

Cook in the bottom Aga (approx 100) for around 12-18hrs depending on the Pork – if you stick a fork in and it falls apart it’s done.

Cuban bread

Having first had this in a little bakery in Havana and falling in love, I persuaded the owner to teach me how to bake them. She used an old enamel cup to weigh the flour out so I’m being true to this. They are sort of an enriched dough, but lack the eggs of a brioche style. Soft and slightly buttery, you can see why they make a fantastic sandwich.

Ingredients 

  • 2cups strong white flour
  • 2 teaspoons sugar
  • 1 tea spoon salt
  • 2 tablespoons soft butter
  • 1 teaspoon dried yeast
  • 1/2 cup warm water

Start by weighing out the ingredients and then combine in the bowl of the mixer.
Using the doughook slowly add the water till a soft dough has formed. Then keep kneading at a medium pace for around 5mins.


The same principle can be used to hand knead the dough, it will help with any bingo wings which are starting to form as well. 
Let the dough rest in an oiled bowl for around 1hr or until doubled in size. In the mean time I would suggest fixing yourself a rum based drink or working out where to get more Jag parts from.


After an hour, your dough should be nicely proved. Knock the dough back and turn out onto a well floured surface.
Divide the dough into 4 and shape into balls, taking care to tuck the bottoms under to aid in the rise.


Prove again for around an hour until doubled in size -more Rum would be my suggestion here.


Cut a cross into the top of the rolls and bake at 190C till brown and delicious -around 15mins. In the last 5 mins you can sprinkle with flour for effect.

Cuban Burger

Basically a burger, but so so much more

Ingredients

  • 1lb. 70/30 lean beef coarsely ground
  • 1 small onion
  • 4oz Chorizo
  • 1 small chilli
  • Parsley, sage and a sprig of thyme


I’m not going to lie, I don’t know if the Cuban burger is one which originated in Cuba, or was a bit of an American import during the roaring 30’s. Either way it’s delicious. A mix of smokey chorizo, good quality beef and a kick of chilli.

You can either mince the beef yourself, using something like chuck/brisket or get your butcher to grind it for you as I have. Start by dicing the chorizo into small pieces, approximately the size of a pea.

IMG_0118.jpg

After this, finely chop the chilli, onion and herbs. You can leave this coarse, if you prefer a chunkier nature to your burger.

Combine all the ingredients in a large bowl and, using your hands, mix together and divide into 4 balls. This gives you burgers somewhere a smudge over 1/4lb………….

Although I have a burger press, the rustic nature of the burgers at the bar on the beach would be disrespected if I were to use it. Therefore using the palm of your hand, flatten into discs.

IMG_0122.JPG

All that’s left to do is cook them in a hot pan with a dash of oil. Flip over after around 5mins when a good char has been achieved.

Lets Eat

All that remains is to assemble the burger. I find that it’s best to toast the rolls to give them some structural integrity. Then just add a good smear of mayo, the burger, some cheese, the Pulled Pork and the bbq sauce. Serve with a side of crispy potatoes, coleslaw and obviously a token salad leaf…………….


IMG_0136.JPG

Oh, I nearly forgot. The car, well I promised the friend who gave me the advice that I would run the Mille Miglia with her when we both became consultants. Should have the D’ restored by then……..

Pretzels and Beer – any excuse will do……… aka Happy 4th July

“Mike, I’m making a special beer for the 4th of July” – News such as this calls for a special kind of bar snack I thought to myself.

I’ve been over to America few times now, mainly on business but once I went just for a long weekend to test fly a jet. That was a couple of years ago, but whilst I was there I was fortunate enough to stumble across a little brewery that served cold beer and fresh soft pretzels. They really are the perfect evening snack.
Fast forward to 2017 and my old music teacher/famous Jazz mucisan Greg dropped the bomb shell: – a 4th July party and beer launch – well there was only one obvious food to go with it………..

img_9922.jpg

Soft Pretzels

Finally, I have my own wot-not to display pretty Emma Bridgewater in the background of shots.

IMG_9897


Ingredients

  • 1lb strong white flour
  • 1tsp dry yeast
  • 2tsp salt
  • 2oz molten butter
  • approx. 4oz sourdough
  • 300ml warm water
  • 1lt boiling water + 7g Bicarbonate of Soda for bathing
  • Butter, salt, sugar, cinnamon and poppy seeds to finish

Start by weighing out the flour, salt and yeast – I’ve finally gone back to dried as I’m laying off Carbs atm so don’t make as much bread. FYI- The scales are from my grandma and at least twice as old as me……

IMG_9898.JPG

Combine in the kitchen aid with the sough dough starter and gently incorporate.

Now its time to add the water. You might not need it all, depending on your starter – but you are aiming for a soft, but not wet dough.

IMG_9901

Once all together, knead with the dough hook for 10mins until a shiny, elastic dough is formed.

Place this in a well oiled bowel and cover with cling film. You can now fetch the first of your beers to celebrate July 4th whilst it proved…………..

IMG_9906.jpg

Ideally it should be left overnight in a cool area (fridge) or if impatient/short on time then at room temperature until doubled.

IMG_9909.jpg

Now comes the fun part. Divide the dough into 16 equal balls. This will make the perfect sized bar pretzels. (Divide into 8 if you want big ones – greedy)

Taking 1 ball of dough, pretend you are back in pre-school and making play dough sausages – using the palms of your hands roll the dough into a long cylinder.

Then, taking the 2 ends up into the air and producing a U – spin the base around itself to produce a twist at the top end and lay the dough back down, pressing the ends into the base of the U.

Alternatively you can use cross them over whilst its flat on the work surface – a lot easier and more reliable………….

img_9914.jpg

To get the lovely deep drown appearance normally found on Pretzels, the next step is important. After making each Pretzel, dip it into boiling water mixed with Bicarb. You can then sprinkle on either salt, poppy seeds etc to finish.

Once you have made a whole tray, transfer to an oven at 200C for 10 mins or until golden brown.

Lastly, whilst still hot out the oven, glaze with a little melted butter…….

img_9919.jpg

Or butter, cinnamon and sugar if you are feeling like dessert.

Let’s Eat

All that remains is to grab a pint, tell Swifty that you’ve stollen her jazz pianist but will give him back later and enjoy the 4th in style.

IMG_9929

P.s I never did tell TS…… wonder if that’s why she cancelled her part. Anyway, I’d like to thank Greg, Pat and the Draycott Brewing team for a fantastic 4th of July x

BBQ time – Vension Burgers

I just bought a microbrewery to celebrate Bake Off – but more on that later.

According to my friend who works as a BBC weather presenter – it is summer, and that can only mean 1 thing – BBQs. I have many happy childhood memories of these.  One of my favourites was the annual trip to a small country pub called the Beeheive for the August bank holiday. The pub would put on a big BBQ, we would take dads Alfa Spider, there would be Maypole dancing and Morris men. Infact it might have been at one of these I had my first pint, held in one chubby teenage hand whilst the other was grasping a burger.

IMG_9594.jpg

Well, with the offer of a perfusion PhD in America on my desk once again, I thought I would relive the memory…………but in slightly more fancy style – venison burgers, ciabatta rolls and wild garlic mayo!!!!!

Ciabatta Rolls

  • 1lb Strong flour
  • 1tspn Salt
  • 5g Dry Yeast or a knob of Fresh Yeast
  • 50ml Olive Oil
  • 300ml Water
  • 6 Poaching Rings

Ok, so I realise that ciabatta is a bit of a controversial bread choice for a burger, but I have reasons. I regularly take my F1s out for dinner and at one meal Harry started eating his burger with a knife and fork. He claims the bun wasn’t strong enough, I claim  he needs to man up. Anyway, ciabatta is strong so no need for a fork.

Start by weighing out the flour, salt, yeast and combining in the kitchenaid. To this add the oil and water.

The dough is relatively wet, so it is much easier to make in a mixer with a dough hook. If you want to make it by hand, just remember to oil them and be patient.

Mix on a relatively high speed for 10mins until a highly stretchable dough has been made.

IMG_9499.jpg

As the dough is so wet it needs a frame to prove in. Otherwise it would just be a bit of a mess. The poaching rings from my pulled pork blog once again have been pressed into service. Place on a well floured baking tray.

Cover with oiled cling film and leave to prove for around an hour or until it has doubled in size. When well risen, and you have managed to sink a few Gin and Tonics, it’s time to bake. Make a cross cut onto the top and  transfer into a preheated oven at 200C.

Bake until golden brown – this varies due to size, but around 20mins.

Venison Burgers

Nothing goes with Venison quite like gin, well juniper to be precise. Sadly, I can’t lay claim to having discovered this having stolen the idea from Hide burger a few years ago.

IMG_9515

Ingredient

  • 1lb Venison mince
  • Juniper berrys
  • Gin
  • 2 small white onions
  • Sage, Parsley and Pepper

Start a few hours before you are planning on eating by soaking the juniper berrys in Gin. This allows you to impart the subtle flavours of Gin into your burger. Lets face it, who doesn’t like Gin.

Finely dice the onion, herbs, Juniper and combine with the Venison mince. Season with a twist of salt and pepper. Now to the fun bit of forming.

IMG_9516

Divide the burger mix into 4 and mould to shape. A burger press can be really helpful to get the shape just right. Leave in the fridge for 30mins to firm up.

Now, there are lots of different ways to cook a burger; steam, oven, pan but BBQ has to be king. Given this blog is in honour of the Beehieve, only a BBQ will do. Cook for around 5mins on each side, brushing with oil to stop sticking.

Time to Eat

Right, time to relive the glory days – Burger anyone?

Lightly toast the ciabatta bun then assemble the burger with a generous helping of wild garlic mayo, Bloody Mary Ketchup and a handful of salad. Finish with a side of homemade slaw and a beer.

img_9567.jpg

P.s I’ll mini blog the Mayo and Ketchup for you all soon x

Lets live like Kings – Millionaires Shortbread

“There is an island to which no airline flies. Its boarders are not open to you and I, for they are guarded by youth”

I love Millionaires shortbread, it is a memory of childhood captured in cake form. The first place I ever had it was at a little tea room called Mintons, now long gone. Every week the owner Roger would make a batch and keep a piece back for me.

Well, given that I still need to cram in a bit more practice before bake off, I thought I would make a batch of my own. Relive my youth, its boarders are still open to me after all……..


Millionaires Shortbread

I will apologies now; to make the caramel you have to stir constantly and it will give you arm ache for a few days,

Ingredients

Shortbread

  • 9oz plain flour
  • 8oz butter
  • 3oz caster sugar

Caramel

  • 2 tins condensed mild
  • 2oz light muscavardo sugar
  • 2oz dark muscavardo sugar
  • 4oz butter

Chocolate – lots of it

IMG_4561

Ignore the eggs, milk and yeast – I  was making brioche as well, more on that later….

Making the shortbread is very easy. Combine the ingredient in a mixing bowl and work together into a breadcrumb stage. As it has such a large butter content this will start clumping together. When it starts to combine into a large ball, spread evenly in a lined and greased tin. Relieve some inner tension and poke it a few times with  a fork to create the familiar pattern we all know and love.

Now bake this at about 180 ( middle of an Aga) until golden brown; you may need to turn half way through. When done, set aside to cool…………. The fun is about to begin.

Normally I would encourage you to multitask, but concentration with caramel is key. Its simple to make, but even simpler to mess up. Start by combining the ingredients in a large pan and melting the butter and sugar.

When everything is melted it’s time to turn up the heat. On a medium heat keep stirring, and for gods sake do not stop. Even if the cute brunette from before is calling you up to arrange a secret weekend, just ignore it…….. The moment you leave the caramel, disaster will strike – it catches on the bottom of the pan and burns. You will not look away now, will you?!!

When the caramel feels thick and is stiff to turn (about 10 mins after your arm has dropped off) test it – get a friend or wandering old person (dad) to dip a spoon of it  into some cold water. When cool, if it is just solid enough to hold its shape when you push it off the spoon, its done. The friend can now try the caramel for taste as well.

f at this stage you want to get really fancy, you can add salt, coffee or even lavender to make the caramel even more special. After this, simply pour onto the shortbread and leave to cool.

IMG_4584

When it’s all cool, top temper some milk chocolate and pour on top. I learnt to temper chocolate a couple of years ago to impress a fellow F1…….. Completely useless skill at the time, but now with bake off looming – cheers H.


Time for a treat

So, there you have it – Millionaires shortbread.  All that remains to do is grab a coffee and eat. The great news is that this batch is for sale in the tea room this weekend.

IMG_0016

p.s thats the correct ratio of shortbread to caramel. Don’t forget to pop in this weekend and have a piece for yourself x

When life gives you lemons: Tarte au Citron

Due to a rota misfortune I have been on call for the majority of the last 2 months including Christmas day and New Years day. As a reward, my mother decided that lemons would be needed, not for G&Ts but for tarts…………
I love tarte au Citron, the sharpness of the lemons contrasts with the sweet pastry making a great afternoon treat. Seeing as during my on calls I also got a call from The Great British Bake Off Team to tell me that that I have been shortlisted I suppose I should take this seriously. So here goes, Tarte Au Citron (fingers crossed for no split filling or soggy bottoms).

Tarte au Citron.

IMG_8433.jpg

Ingredients

  • 8oz plain flour
  • 6oz butter
  • 2oz caster sugar
  • 1 egg yolk
  • 6 lemons
  • 10 whole eggs
  • 640ml double cream
  • Icing sugar

Start by making the sweet pastry. Once again I’ve camped out in my family kitchen and am using my mothers Kenwood. If Kitchenaid would like to give me another mixer that would be lovely as this one is on its last legs.
Start by rubbing in the cold butter, sugar and flour till you have a breadcrumb mix. Ideally you don’t want to work the butter too much as it melts and the end result is chewy pastry.

Once at the breadcrumb stage, add the egg yolk and milk and bring the pastry together into a ball. Cover in cling film and rest in the fridge for around an hour to allow it to relax.

Having finished your cup of tea (a luxury not afforded on night shifts), collect the pastry from the fridge and roll out on a well-floured board. You are looking for a thickness around that of a £1 coin. Lift the pastry over the rolling pin, and line a well greased 30cm tin.


This is one my gran used to use and rather big. The recipe will comfortably feed around 10 people so it’s great for a party.

Return the pastry case to the fridge again for another hour to allow it to rest. Once chilled, prick the case and line with parchment and baking beads. Cook in the Aga or around 180C for 20mins till pale golden brown. Remove the beads for the last 5 mins to avoid the dreaded soggy bottom.


Now to the filling. Beat the eggs and add the sugar. Beat together till light and then add the lemon zest.

To this, add the cream and once again combine well. Now comes the scary bit, adding the lemon juice. My top tip here would be to add a little bit at a time and make sure you are constantly whisking.

Transfer your (hopefully not split) mix to the cooled pastry case and bake in a low aga or 170C for 40mins- you are looking for a little bit of a wobble in the middle.

Now to finish you have an option. You can either pipe “Citron” on the top in chocolate or go a bit rogue…………… I crossed the line and added a creme brûlée style crunch topping to give another level of texture (Hollywood I hope you approve).
Dust the top of the tart with icing sugar and find a blow torch. Gentle woft over the top to caramelise the sugar. Now let it set and then you can enjoy.

Afternoon tea anyone?

So there you have it, tart au Citron. I decided to serve mine with a drizzle of dark chocolate over the top and some whipped cream. But the raspberry coulis from the waffle Blog will be nice as well…………….

img_8528
I’m going to be stepping the blogs up over the next few weeks and you can follow it on Instagram on #DrCoxforGBBO. I hope you enjoy x